Thursday, October 26, 2023

RECIPE Gingerbread House

 🍪 26 October 2023, Thursday 


This cookie is stable enough to build a house out of, is not too sweet and lightly scented with ginger and cinnamon. 

Recipe for one gingerbread house 18 x 18cm (as in the picture)


The method for this is how you would make pate sucree. I make mine in my Tokit (similar to a Thermomix). Just dump the ingredients in- measure them directly in to the bowl, no need to wash extra measuring bowls! Put the lid on and process - in less than a minute, it is done!


RECIPE:

Preheat oven 180 °C, bake at 170 °C for 20-23min 

Into the Tokit goes:

380g cake flour
80g icing sugar 
20g corn flour

The following: 
1/2tsp cinnamon powder 
1/2tsp ginger powder 

Or 
3g mixed spice powder 

Make a well / doughnut shape trench for
1 egg
160g unsalted butter, cold 

Process in the Tokit at 
Speed 6.0-6.5 for 10 seconds, 
Then 5.0 for 20-45 seconds. 

The flour, sugar, spices, & egg - measured directly in the bowl. 

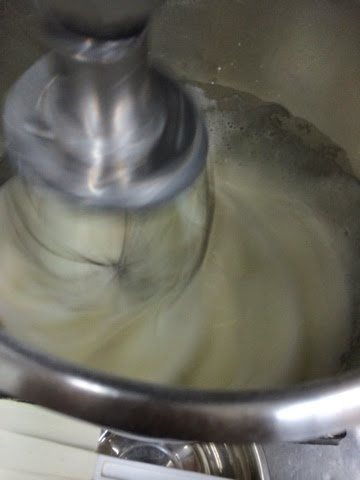
In goes the butter. Still cold. 

Check the progress halfway, I like to stop it around this stage, just slightly before it turns into a ball of dough. 

Turn it out onto baking paper, roll it flat and chill or freeze it. 

Cut them out to desired shape and size. 
10g egg for egg wash 

Bake at 180 °C for 20 minutes. 

Icing for building the frame: 

1g gelatin powder 
4cc cold water 
Bloom the gelatin and melt it to liquid 

100g Powdered Sugar 
1g egg white powder 
Add the melted gelatin, beat with hand mixer, add
10cc water til texture is correct. 

Icing for decoration: 

200g Icing Sugar 
4g egg white powder 
Sieve this 

30cc water 
Stir in to above in 5-6 additions, adjusting water level accordingly. 
Add colouring as per requirement and stir. 
Less water is harder icing for outline, 
More water til flowy is for flooding inside with icing 


RECIPE Homemade Udon

🍜 26 October 2023, Thursday 

My boy loves udon. My husband and I, not a fan. 

I had to try making it at home, and because it has a little tapioca flour, the texture is QQ, my boy loves this. 

It was gotten off a Chinese/Taiwanese blog I cannot recall which  

Handmade Udon: (1 portion) 

140g water
5g salt 
Stir to dissolve the salt in the water. 

50g Tapioca flour 
250g AP flour 
Measure this in a bowl and drizzle in the salt water in 2 batches. Adjust the water amount accordingly. Stir to mix into shaggy dough, rest 30 min. 

Knead dough til shiny (might take 8 min) 

Cling wrap and rest 60 min. 

Roll to 3mm thick, slice 3mm wide. Making sure to flour it well. They tend to stick. 

To cook: 

In a pot, bring some water to boil, add salt. 
Cook the strands of udon til they float, remove and dunk in cool/ice water. 

Drizzle oil (sesame or garlic or onion) and stir through, eat immediately, when cooled and kept, strands would stick. Reheating it would make it lose the QQ texture.

Uncooked dough/noodles can be kept in fridge for 1-2 days,(possible to vacuum pack them too) they might stick, or can be kept in freezer for up to 4 days. I decided to stick them in my dehydrator. 


Overnight they dried up and hardened. I had them too long this time and had to break them in order to fit in my container. Will make shorter strands next time. I haven’t yet cooked them from dry. Will try next week - hope it works and the texture maintains! 

UPDATE: I just cooked the dehydrated udon. Nope. The texture changed. It still received the thumbs up from the boy but I feel it was nicer when it was freshly made and cooked. 
Might try the freezer method next. 

Bon Appetit!! 😋 


RECIPE Foccacia (that brings me straight to Cinque Terre)


 🍞 26 October 2023, Thursday 

I absolutely love this recipe I found on YouTube from Natasha’s Kitchen. 

Years ago when I was at Cinque Terre, I had the absolutest most yummiest foccacia. I am not a fan of focaccia and never really ate it but I was a convert after having that one at Cinque Terre. I don’t figure I would be back so soon to Cinque Terre so my tummy was rather heart broken 💔 

However, I found this recipe online and the picture looked good so I decided to try and I love it!! I bake it occasionally and I reminisce my time at Cinque Terre and look forward to going back one day, but with not so much urgency anymore 🤣 


Here is the handwritten recipe, I worked out some proportions.


The one I usually like to bake is the x1/2 portion. The 1/3 portion is good for one person and it leaves u wanting more🤣 

Preheat oven 230 °C (takes about 20min to 45min) 
Bake for 25 Min 

1/2 portion: 
Pan size - square (well oiled) 

180g water (40 °C) 
3.5g yeast 
2.5g honey 
Mix these to activate yeast. Rest 5 min til foamy and bubbly 


235g AP flour 
3.5g salt 
Measure these in a glass bowl, slowly add the water in and stir to mix into shaggy dough 

7.5g oil (olive) 
Knead oil in to shaggy dough 

For visual on steps can check out Natasha’s kitchen on YouTube. 

Rest the dough for 30 min 
Perform stretch and fold 4 times (30 min interval) 

After 4th S&F, transfer dough to well oiled baking pan, coat the dough in oil, 
Rest 15 min and then stretch to fit in pan. 
Proof for 45-60 min. 

Make the topping: 
2tbsp olive oil 
2tbsp water 
2 cloves garlic 
1/2tsp salt
1/2tsp chopped rosemary (2 sprigs) 


Tap down on fluffy dough gently with fingertips splayed open and drizzle topping and 1tsp flaky salt, and send to bake at 230 °C for 25 min. 

Bon Appetit! 


RECIPE Fig Tart

 🎂 26 October 2023, Thursday 


I absolutely adored this recipe I got from an ABC trial. It was a fig tart with a cocoa tart shell base, almond cream cream cheese topping. 

I’ve adapted it here: (x6 portion) 

Preheat and bake at 190 °C, 15-20 minutes 

150g butter
150g sugar 
1/2tsp salt 
60g egg 
265g cake flour 
18g cocoa powder
36g corn flour 

I dunk all of it in the tokit and process it and when it is a lump of dough, I turn it out and place it between baking paper and chill in fridge til firm. 

Sometimes I use this as cookie dough, and so I pair it with this royal icing: 

200g icing sugar
4g egg white 
30cc water 
4g Sakura powder 

To continue with the tart, here is the 
Almond Cream: (x1 portion) 

25g butter 
25g sugar 
20g egg beaten 
25g almond meal / flour 

Cream butter and sugar, add egg slowly in 2-3 additions and fold in almond meal. Pipe in raw tart shell and bake together 190 °C for 15-20 min depending on size of tart. 

Cream Cheese topping: (x1 portion)

30g cream cheese 
10g sugar 
1tsp passion fruit powder 
60g whipping cream

Beat cream cheese and sugar, add fruit powder and slowly pour in whipping cream in 2 additions. Beat til firm to stiff peaks. 

Pipe on the baked tart that has been cooled - chilled even better. 

Bon Appetit! 


#bakewithdin #tart 


RECIPE - Cornflake Cookies


🍪 26 October 2023, Thursday


2-3 CNY ago, when my son was in GESS, they made cornflake cookies in school and I am absolutely surprised it tasted so good. It was buttery and melt in the mouth and also crispy. They added raisins and cranberries as well. Perhaps I was hungry when I tried them, so they tasted even better. 

This year, I tried to recreate them. I tested a few recipes I found online but I could not get the taste I was looking for.  

Finally I used a copycat HKG Jenny’s Butter Cookies (from Whattocooktoday) and added cornflakes in it, it seemed to do the trick! The feedback for the cookies were good as well! 

Here is the recipe for my cornflake cookies: 

[life has been much simpler and I have been able to do much more with my Tokit machine - similar to the Thermomix]

First, toast the plain cornflakes in the oven to crisp them up and when cool, crush them to smaller pieces.
(6-10 min, 160 °C)  

Throw these ingredients in to the Tokit to make the dough/cookie batter:

For 20 about cookies: 

[preheat oven 160 °C, bake at 140 °C, 
bake 20-25 min, turning pan 1/2way] 

125g cold butter 
45g icing sugar 
1/8 tsp salt 
125g cake flour
45g corn starch 
1/8 tsp vanilla powder 

For flavour variation: 
Matcha - 
115g cake flour 
40g corn starch 
5-10g matcha

Cocoa 
115g cake flour 
40g corn starch 
10g Cocoa powder 

Other flavours to try: coffee, earl grey, strawberry 

Process and then add the cornflakes and process again

Remove from Tokit, rest in fridge if butter has softened too much. 

Roll into balls, chill for 30 min, then bake. 
The balls can be kept in freezer for 1-2 weeks, and baked straight from freezer. 

After baking, cool on baking tray for 10 min, store in air tight container when completely cool. 

Bon Appetit! 


#bakewithdin #cookies 

RECIPE - Soup Manhattan Clam Chowder

🥣 25 Oct 2023, Wednesday 

At this month’s ABC Trial lesson, we made an onion and bacon and cheese bun, and a tomato style clam chowder; I’ve just learnt it’s called Manhattan clam chowder. 

I have always known clam chowder to be creamy and milky and I especially love the Japanese one - especially the one I had at Tokyo DisneySea. It is similar to the one at MOS burger, just nicer🤣 


Here it is, the bowl of chowder with the bun


The bacon and onion and cheese oozing out. 


Here it is, still cooking on the stove. 

I love how the recipe was tweaked to use Kagome Veggie Juice. It made it that much simpler and was very yummy and somehow my brain tells me this is also healthy. There is no need to make the mirepoix- the celery, onion and carrot because it is all in the juice, AND more. There are apparently 21 types of vegetables in the juice. 

Sauté some onions with pieces of sliced bacon. Add in cubed potatoes and fry for a while. Add in garlic paste/purée and stir. Now, in goes the canned diced tomato, followed by the Kagome Vegetable juice, chicken stock (or water with consommé powder), oregano, salt, pepper, sugar, bring it up to a boil, and simmer about 20-30 minutes. 

Throw in the clams (frozen & thawed / fresh) when it is a rapid boil and cook for 2-3 minutes on high heat and turn off heat. Let it sit for 2-3 minutes covered before serving. 


You could also have it with pasta, here it is soup pasta style. I added in Capellini at the last few minutes of cooking. 

What I did was to increase the portion of diced tomatoes, and after bringing the soup back to a roiling boil, I added the angel hair pasta for 2 minutes, then I add the clams as per above description. 


Bon Apetit!

#cookwithdin #soup #abcrecipe 

RECIPE Kueh Lapis


Making Kueh Lapis is tedious work. The batter is mixed separately, and the cake baked one layer at a time. It would be real handy to have 3 mixing bowls to begin with. And if you're going to make one cake, you might as well bake the maximum amount of cake tins your oven can hold because then you can justify the time and effort spent on making it. It helps to have company over to chat with you while you bake the layers. 


To begin, measure the butter, condensed milk and vanilla essence. 

Using the paddle fixture, cream the butter  mixture til white, light and creamy. Takes about 15 minutes. 


It will look like this. Set aside. 


Measure out your egg yolks and egg whites. 


Set aside the extra egg whites- maybe a macaron making session?? 😱


Using a balloon whisk fixture, whisk the egg yolks, sugar and trehalose. 


Add in butter mixture once the egg yolk mixture has been properly whisked. 


When that is done, set it aside and wash mixing bowl. Make sure it is sparkling clean; free of oil and free of water. The egg whites get whisked up next with sugar and cream of tartar. Whisk til soft ribbon stage. 


Add the Hong Kong flour, corn flour and the spice flour into the butter egg yolk mixture and incorporate well. 

The egg whites go in two batches, carefully folding in til it's a consistent colour. 


Now the fun begins. The first layer goes in the oven at baking mode, which is top and bottom heat. The second layer onwards goes in at only top heat until the last layer, which is then baked at top and bottom heat. 


-RECIPE-
Prune and Chia Seed Kueh Lapis 
(Recipe from Phoon Huat) 

(A) 
450 gm  Unsalted butter 
4 tbsp  Condensed milk 
1 tbsp  Vanilla flavour 

(B)
15 Egg Yolks
70 gm Fine Sugar 
1.5 tbsp Trehalose (optional) 

(C) 
4 Egg Whites 
70 gm Fine Sugar 
1/2 tsp Cream of tartar 

(D) 
70 gm Hong Kong flour 
20 gm Cornflour 
1 tbsp Lapis spice 


Method 

(Preheat oven) 

1. Cream (A) til light and fluffy. Set aside. 

2. Whisk (B), then incorporate (A mixture). Set aside. 

3. With clean bowl and whisk, whisk (C) til soft peaks. 

4. Sieve (D). Incorporate with (A+B mixture). Mix well. 

5. Fold in (C soft peaks meringue) to mixture. 

6. Prepare prunes by slicing in half and pressing flat. Standby bowl of chia seeds. 

7. Spoon 5 tbsp into a 7" x  7" cake tin lined with parchment paper. Bake for 8-10 minutes.